If you used a StarkEx-based system eight times before June 2022, you’ll be able to claim STRK. That includes over 600,000 dYdX, RhinoFi, Immutable and Sorare users.
Follow this tutorial if you are a StarkEx user:
STRK is claimable on Starknet Mainnet from 12pm (UTC) on February 20th, 2024. The claim window will be open for 4 months. Claiming ends June 20th, 2024.

To claim your STRK, you need to use a Starknet wallet. Follow this tutorial to set up Argent X, Starknet’s leading wallet with over 2 million downloads.
Please note: The screenshots below were taken from Testnet. Follow the same steps when you are on Mainnet to claim your $STRK tokens.
Step 1
Go to Starknet’s official airdrop website: https://provisions.starknet.io/ and click ‘Claim my STRK’.

Step 2
Click ‘Claim STRK’.

Step 3
Accept the terms of use and confirm you are NOT a US citizen. Then, click ‘Confirm’.

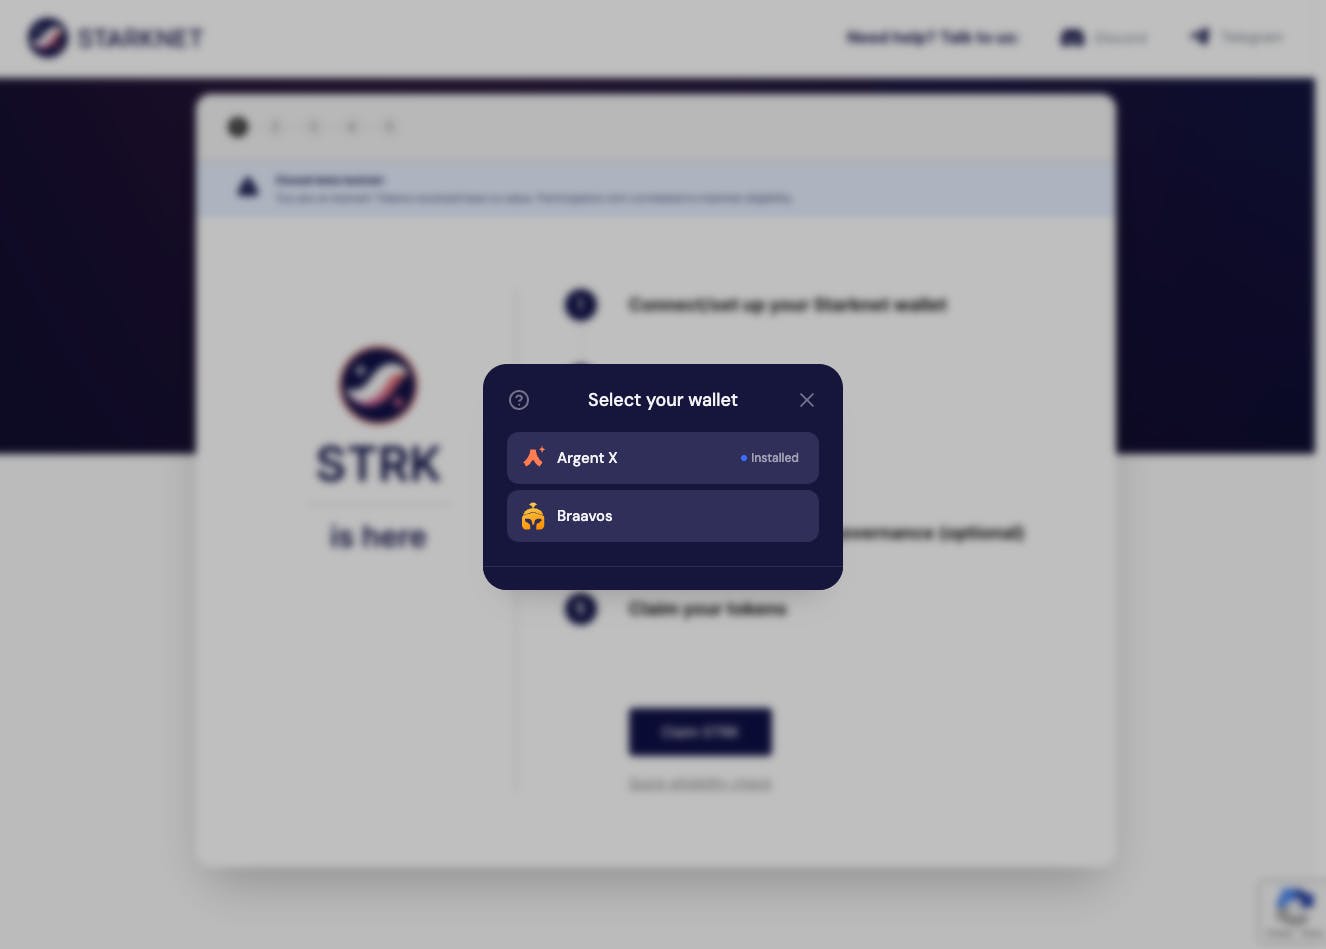
Step 4
Select Argent X.
If you already have Argent X installed, skip to Step 5.
If you do not have Argent X installed, follow this tutorial, then proceed to Step 5 once Argent X is set up. You need an Argent X wallet to claim your $STRK tokens.
Step 5
Unlock your Argent X wallet.
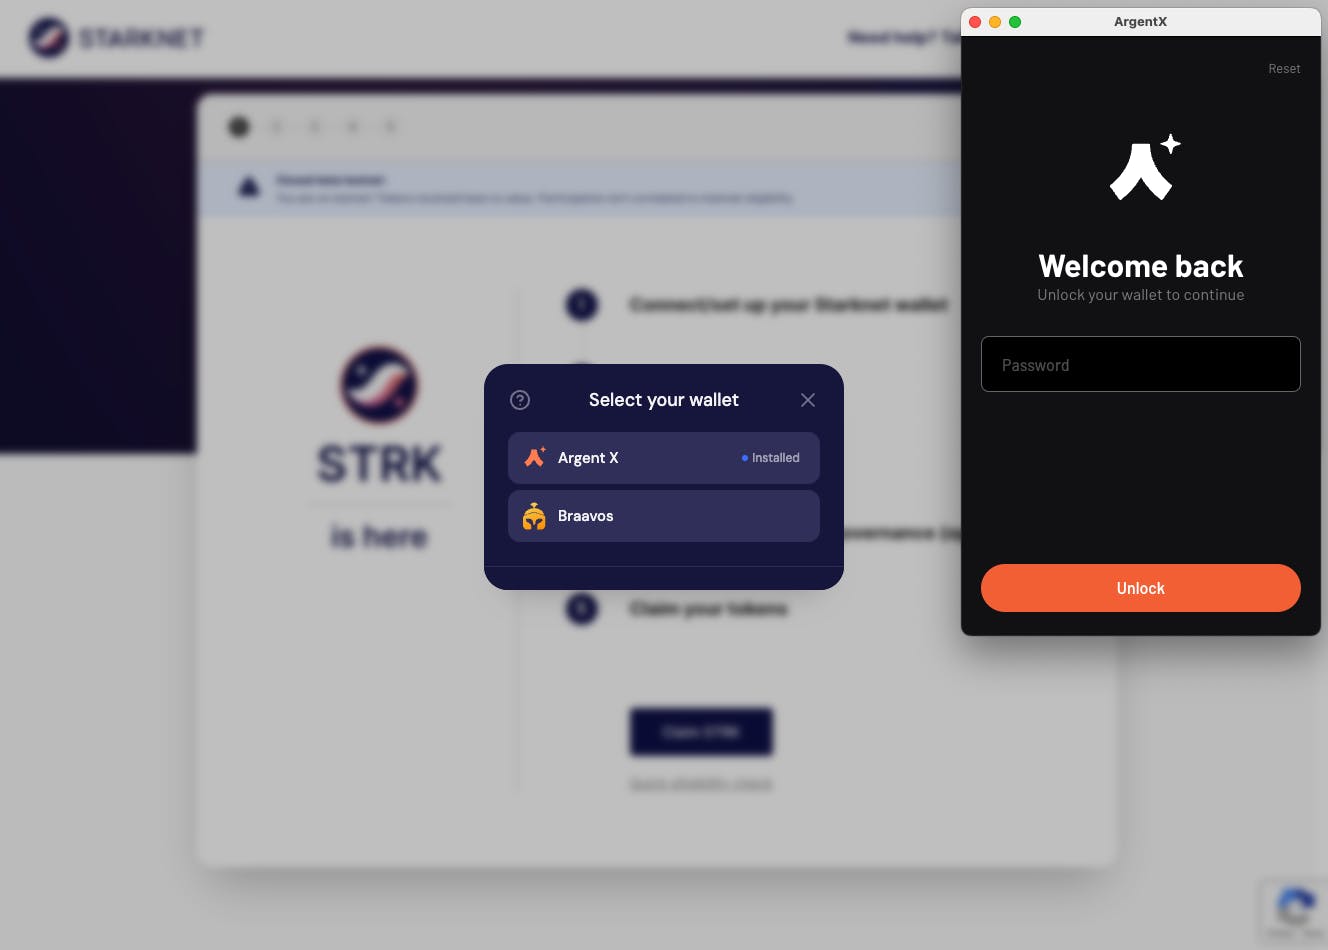
Click ‘Connect’.
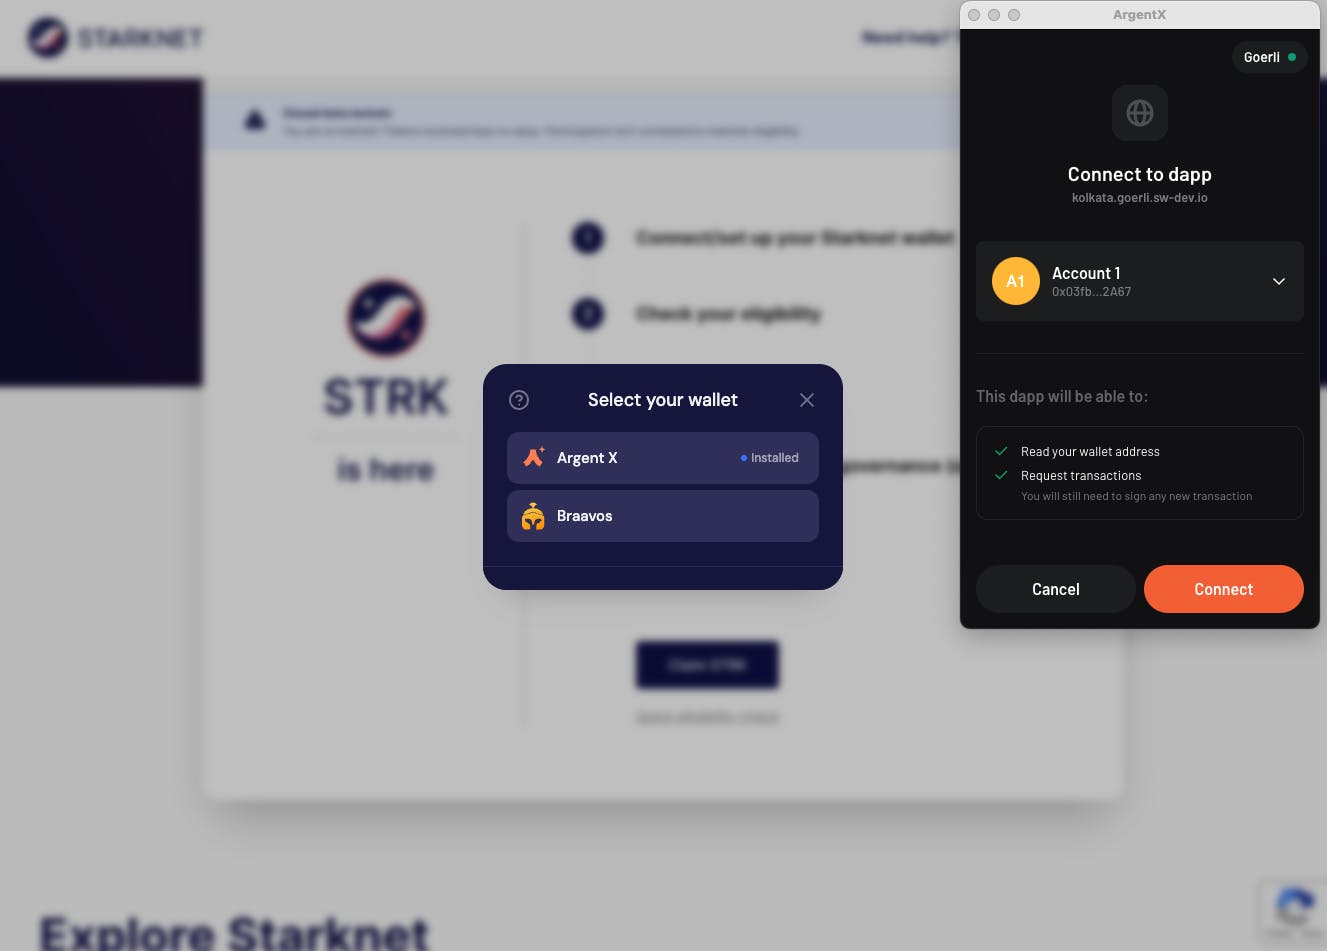
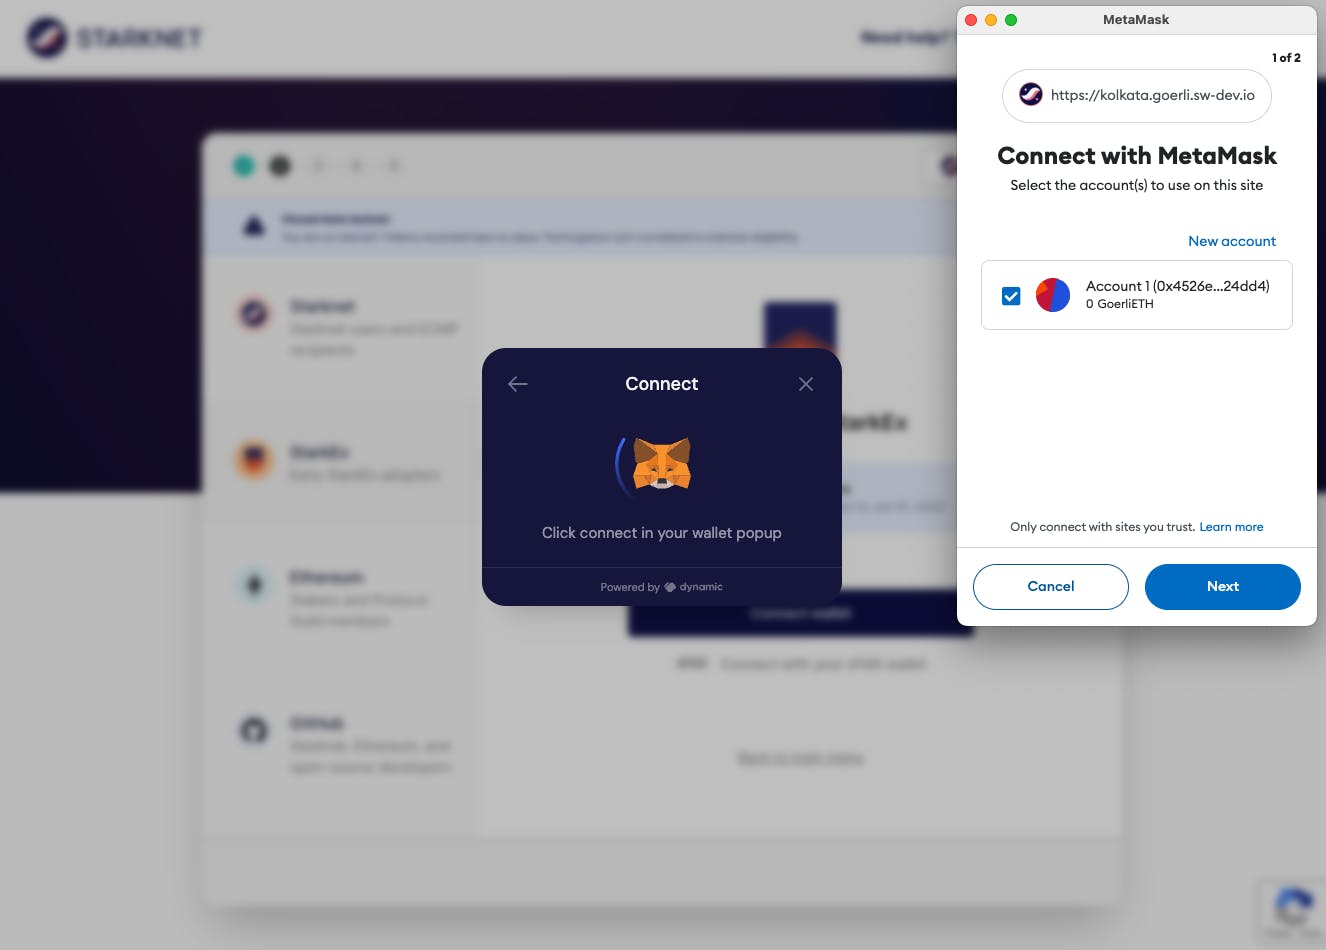
Step 6
From the options on the left, select StarkEx. Then select which option applies to you.
In this tutorial, we will use Metamask as our dYdX wallet.
Sign and connect your wallet.
Step 7
Click ‘See your allocation’.

Step 8
See your $STRK token allocation, then select ‘Claim your tokens’.
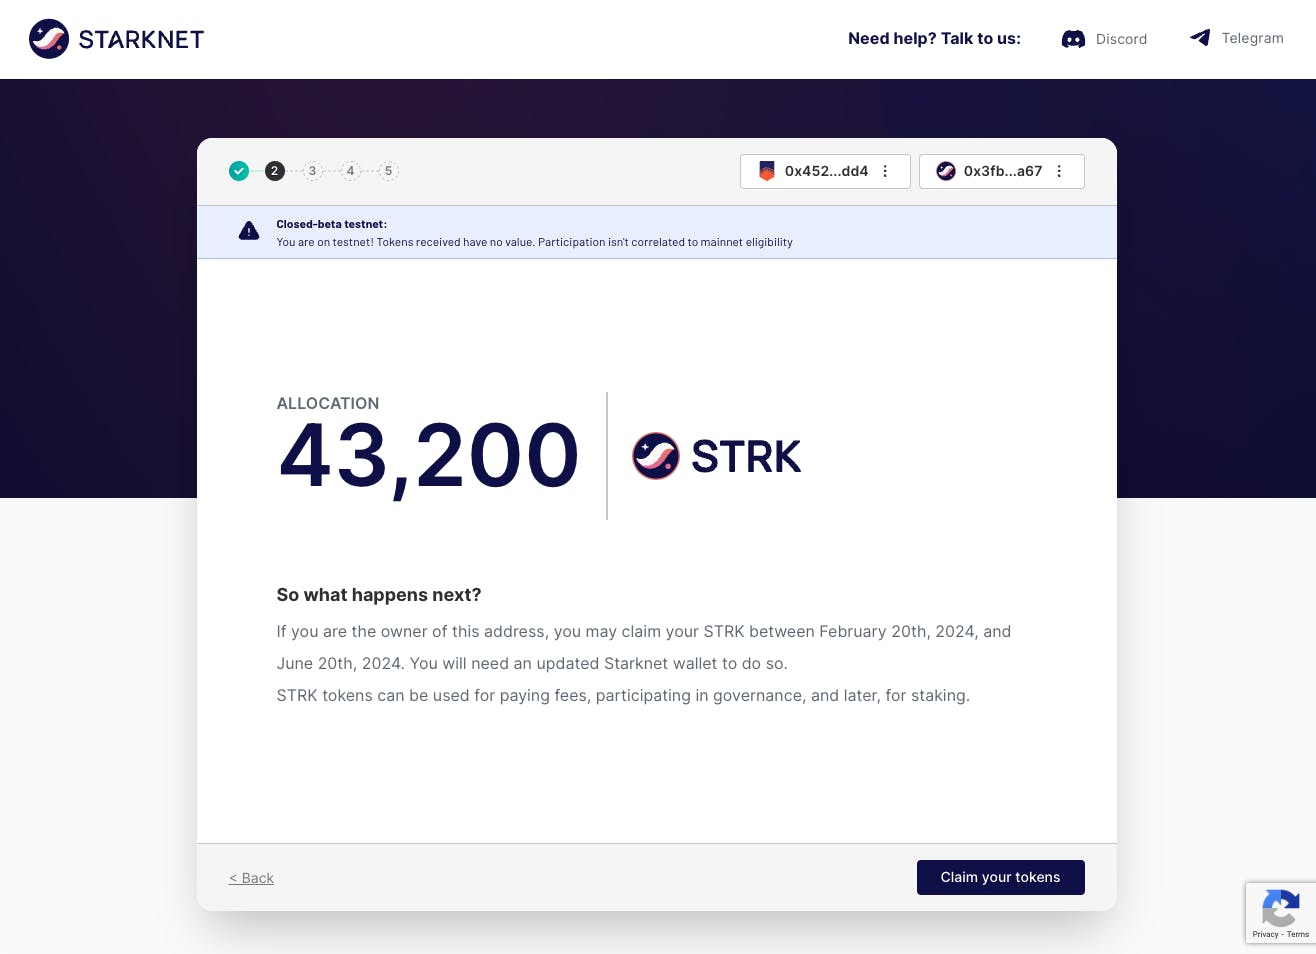
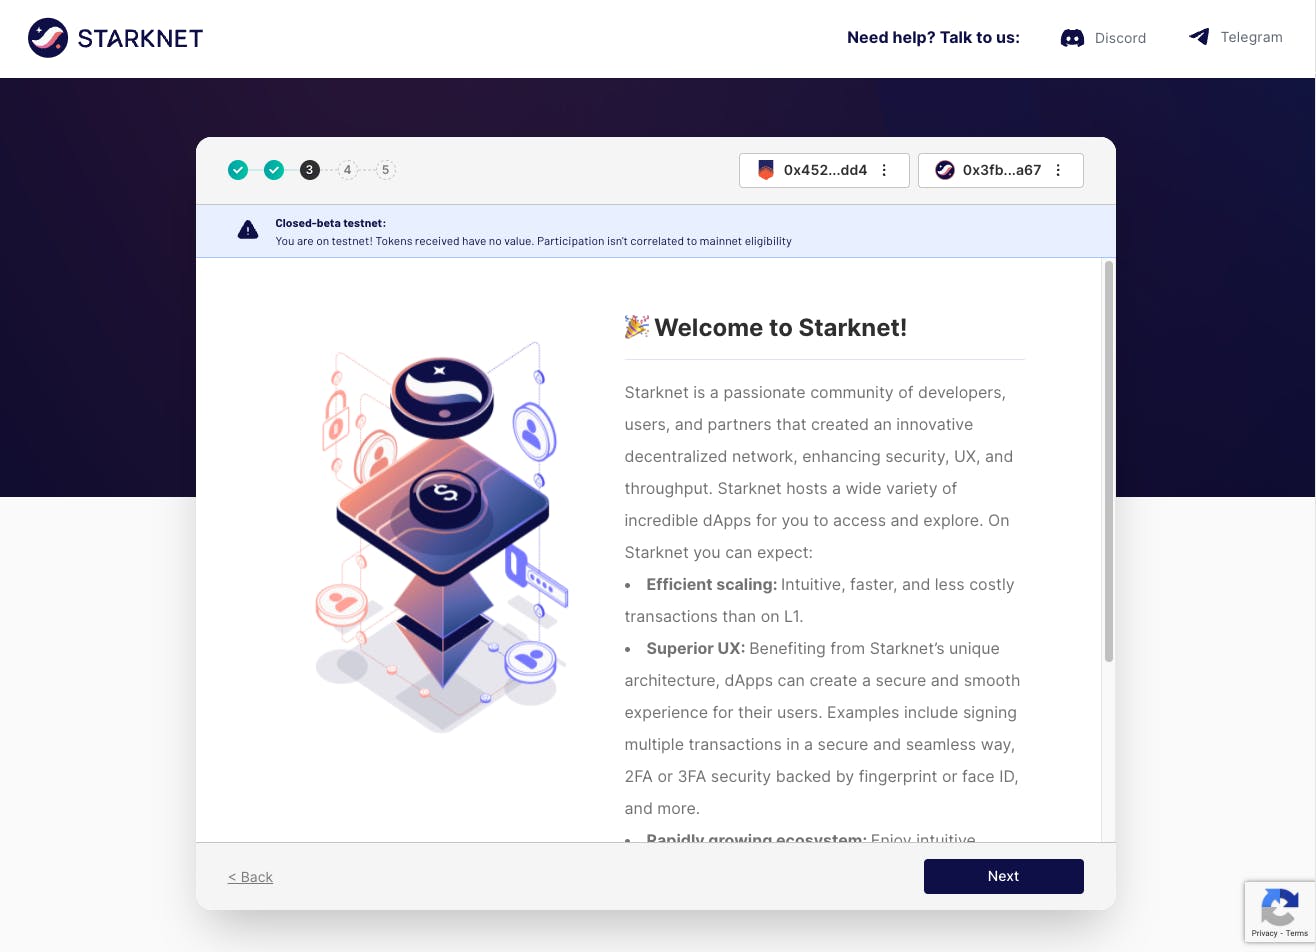
Read the information, then click ‘Next’.
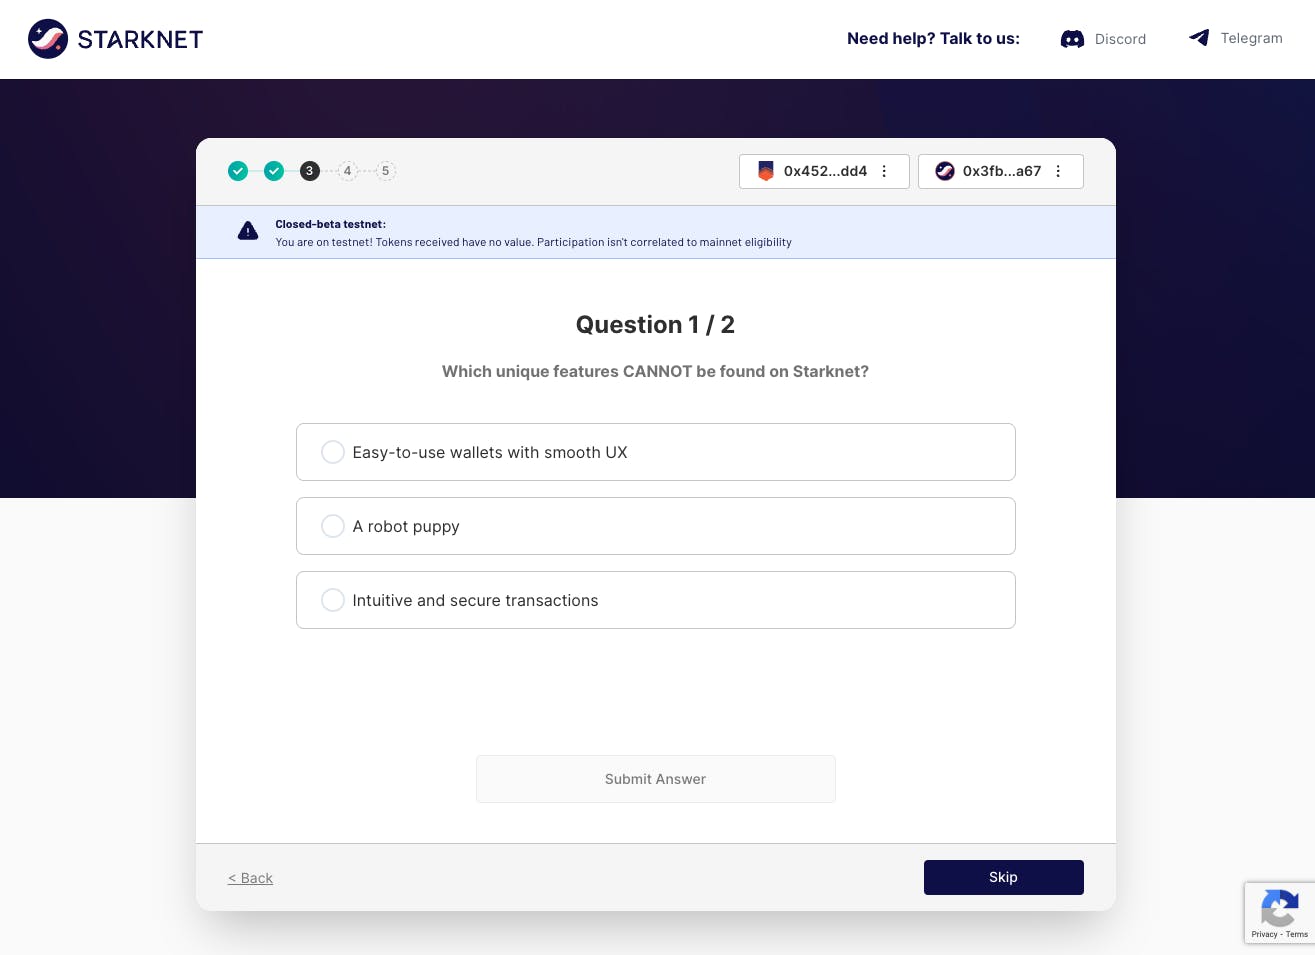
Answer the two questions. Or press ‘Skip’.
Step 9
Read the Voting and delegation information. Then select who you would like to delegate STRK to. Or press ‘Skip’.
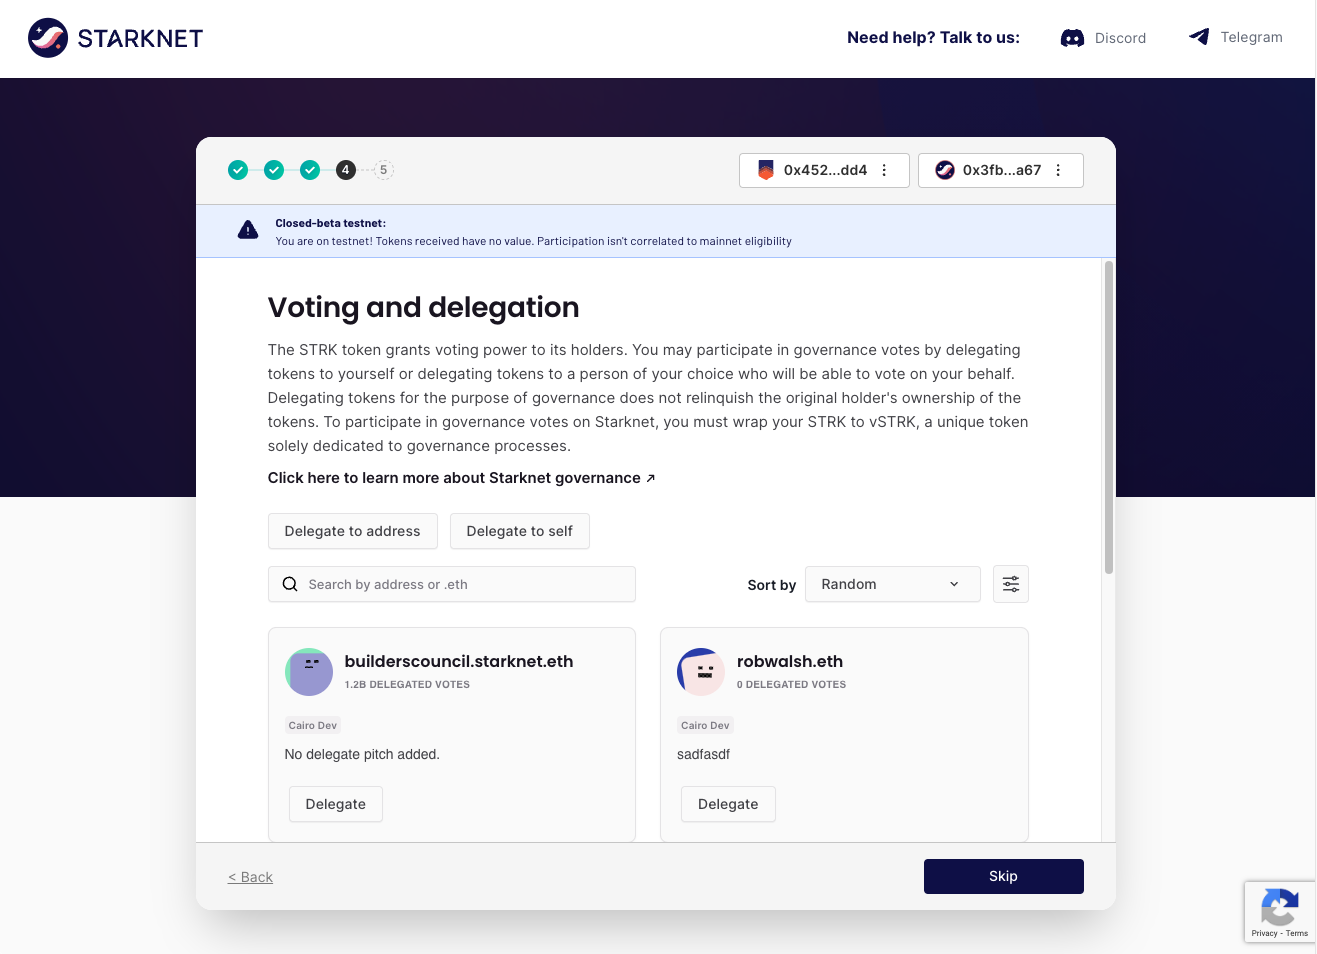
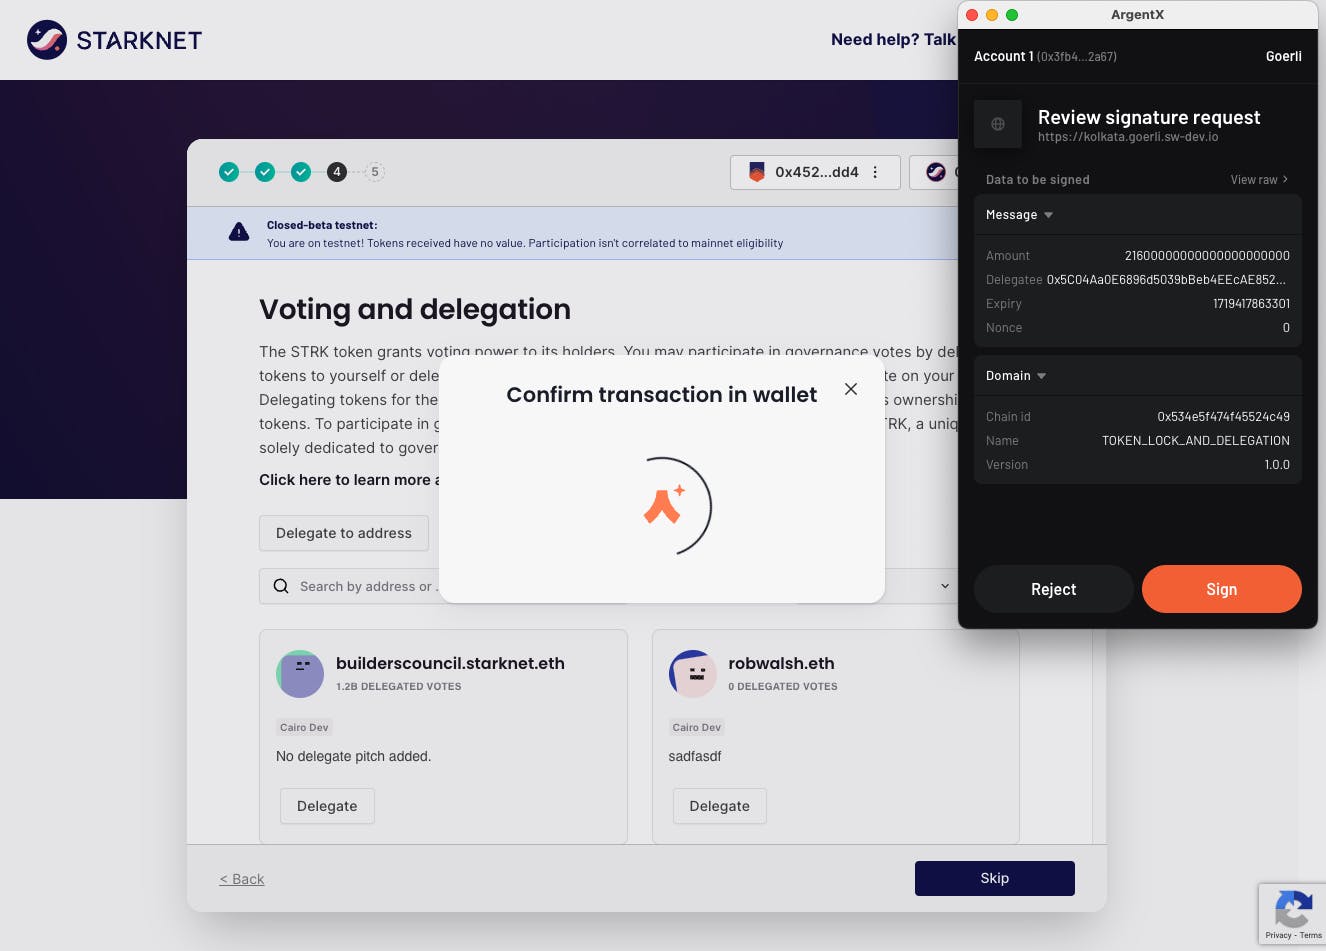
Select the % of STRK you would like to delegate. Then press ’Delegate’.
You can also skip delegation. Learn more about vSTRK here.

Sign the transaction in your Argent X wallet.
Step 10
Click ‘Complete claiming tokens’.
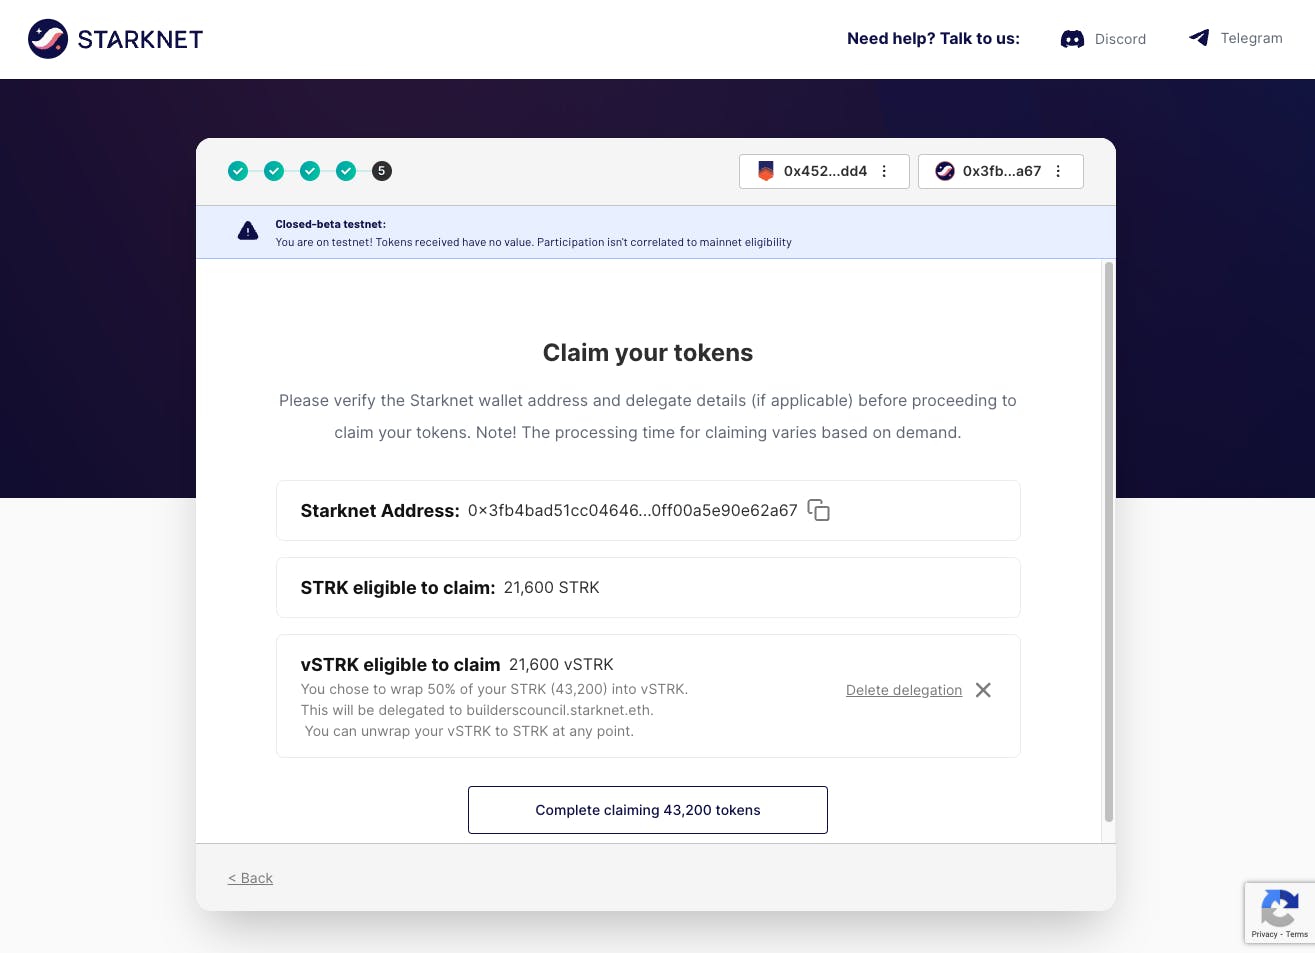
Then click ‘Sign’ on your wallet.

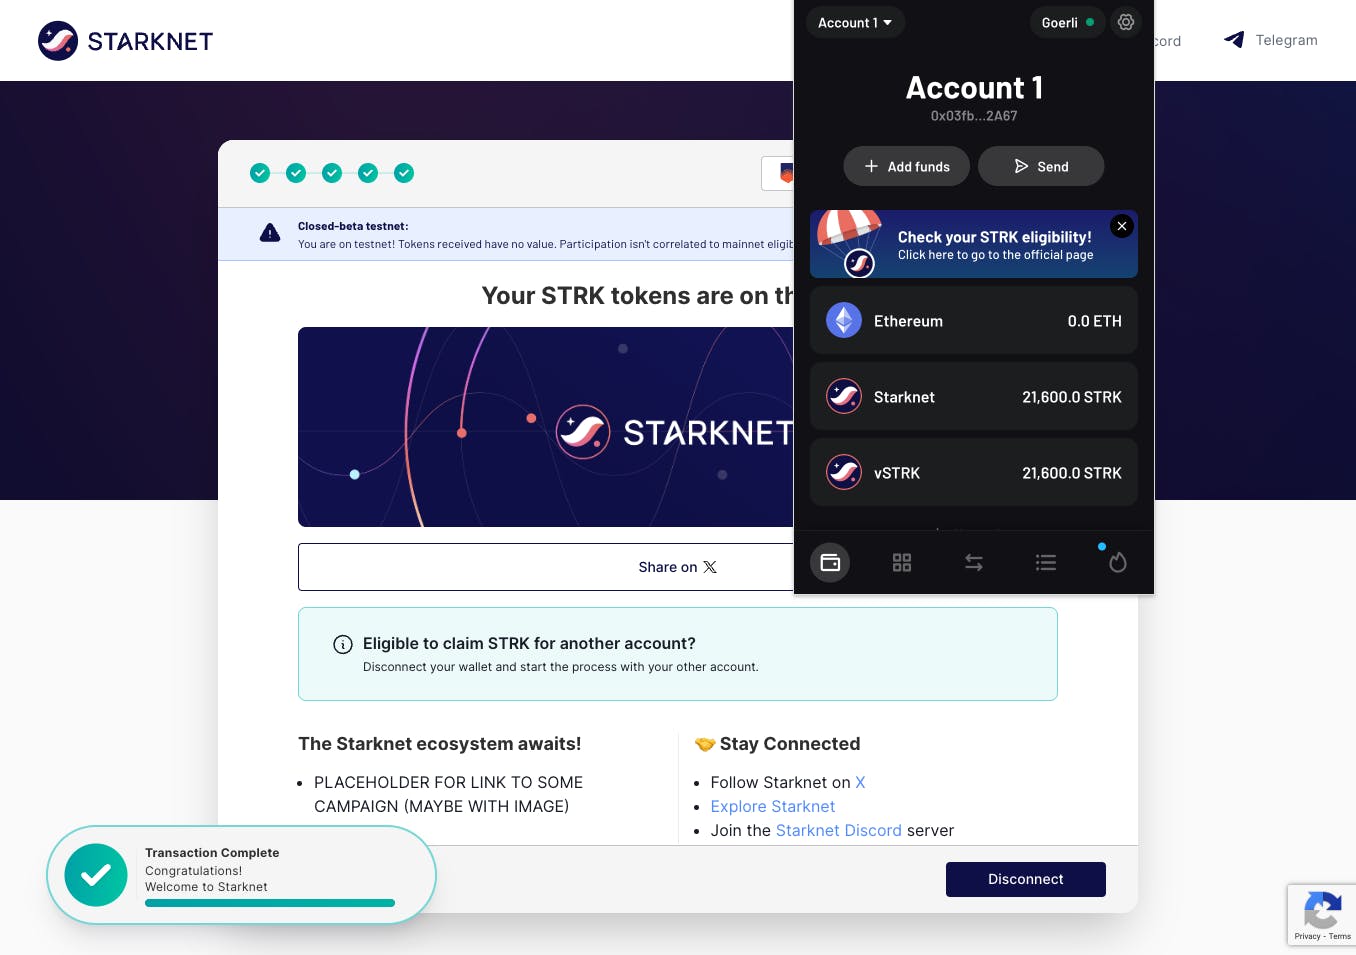
Step 11
Click ‘Complete claiming tokens’. Then wait for your STRK tokens to arrive in Argent X. It may take several hours. You can track the progress by looking at the transaction bar in the bottom left corner of your screen.
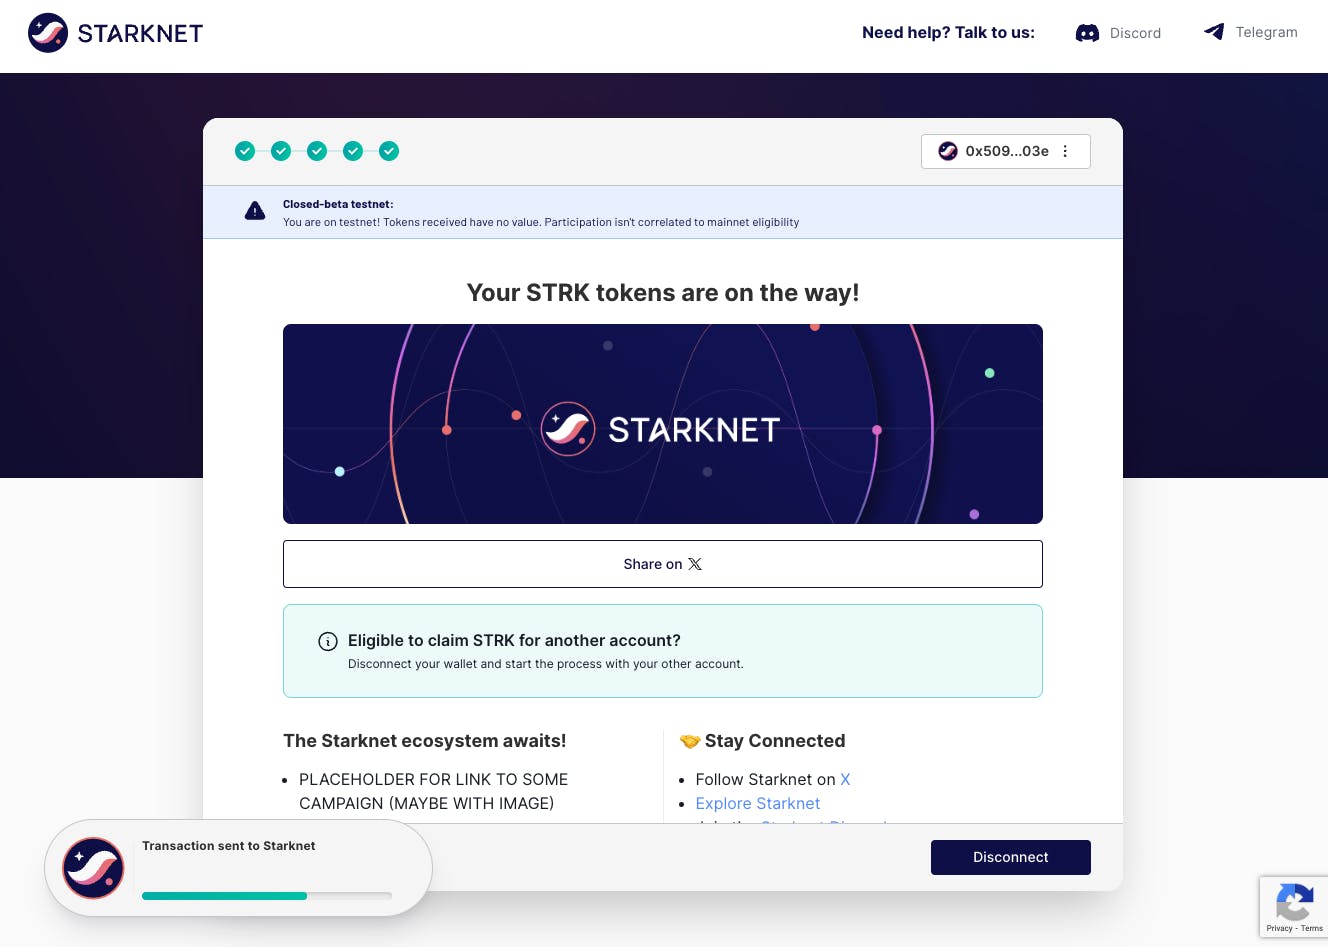
Once the Transaction is complete, open Argent X to view your STRK and vSTRK.
Click ‘Share it on X’ if you would like to share your successful STRK claim with your community. Or click the x icon in the top right corner.
Then click ‘Disconnect’ to disconnect your Argent X wallet.
Congratulations!
You have successfully claimed the Starknet airdrop and are now the proud owner of STRK tokens!
Time to put your STRK to work. Use STRK in DeFi, in governance, or to pay for transaction fees. You can swap your STRK tokens inside Argent X with no fees.
Reminder: The STRK claim window ends June 20th, 2024.
If you have questions about your $STRK token allocation, reach out to Starknet on their dedicated Discord channel: https://starknet.io/discord/
Related Articles

Argent X: How to claim Starknet token ($STRK)
A step-by-step guide to claiming $STRK tokens on Argent X

StarkEx: How to check Starknet token ($STRK) eligibility
A step-by-step guide to checking $STRK eligibility as a StarkEx user.

The best Dapps on StarkNet
Explore some of the best and most exciting Dapps on StarkNet
Did you know?
Argent X is the only open-source and audited Starknet wallet. 7 out of 10 Starknet users choose Argent X.
Download Argent X